Putting in new pallet racking properly starts long before you pick up a single tool. It’s all about the prep work—getting the site safe, lining up the right gear, and making sure every component is up to scratch. This is the foundation for a stable, secure system that can handle serious weight. Skipping these early steps is a recipe for disaster if you want a safe and successful installation.

Before a single bolt gets tightened, the entire success of your installation comes down to meticulous prep. Get this stage right, and you'll avoid costly stuff-ups, keep everyone safe, and set yourself up for a smooth assembly. It's just like the foundation of a house—cut corners here, and the whole thing could come tumbling down.
The absolute first thing you need to do is a thorough hazard identification to spot and manage any potential risks. A proper site check isn't just about measuring the space; it's about making sure the whole environment is ready to support a heavy-duty storage system.
Your concrete floor is literally holding everything up. You have to be 100% sure it’s suitable before you start. Most engineered racking plans will call out a minimum concrete strength and thickness, typically around 25 MPa and 150mm deep, which is needed to handle the massive point loads from the uprights.
An uneven or cracked floor can throw the stability of the entire system out the window. Grab a laser level and check for any major dips or rises. A perfectly level surface is non-negotiable for getting the frames to stand perfectly vertical (plumb), which is essential for distributing the load safely and evenly. You'll need to sort out any dodgy patches of floor before you even think about installing.
Key Takeaway: A weak or uneven concrete slab is a massive safety risk. Never, ever install pallet racking on a floor that hasn't been given the tick of approval by an engineer or doesn't meet the system's specs. Fixing the floor now is a whole lot cheaper than dealing with a collapsed rack later.
Having all your gear ready to go prevents delays and ensures the job gets done right. A pro installer turns up with a full kit, and if you’re tackling a smaller job yourself, you should too.
Here’s a quick checklist of the essentials:
At Super Rack, we put safety first, always. Our installation crews are fully equipped and properly trained, which is all part of our promise to get the job done right, the first time. Fast delivery is one thing, but making sure it's installed safely is what really matters.
When the truck with your new racking shows up, don't just sign the paperwork and wave them off. Do a full inventory check against the packing list. Make sure every single piece—frames, beams, bolts, anchors, and safety pins—is there and in good condition. A single missing box of safety pins can bring the whole job to a grinding halt.
For most commercial racking setups, you'll also need a building permit from your local council. This is to make sure your installation complies with the Building Code of Australia and all the relevant standards. You can get across the nitty-gritty by reading up on the AS 4084-2012 pallet racking standard, which is the bible for safety and compliance in Australia. We know navigating this can be a headache, but our team can give you expert advice on the documents you’ll need to be fully compliant from day one.
A smart layout is the foundation of an efficient and safe warehouse. Before you even think about installing a single upright, sketching out a solid plan will save you a world of headaches down the track. This blueprint dictates everything from how quickly your team can pick orders to how safely they can move around, so it’s worth getting right.
Think of it like designing a kitchen. You wouldn't put the fridge and the oven at opposite ends of the room, forcing you to walk back and forth constantly. In the same way, your racking layout should be designed around your specific workflow to minimise travel time and maximise productivity.
First things first, grab a tape measure and get the exact dimensions of your warehouse. You need the total length, width, and clear ceiling height. The clear height is absolutely crucial—it’s the distance from the floor to the lowest overhead obstruction, which could be a light fixture, a sprinkler head, or a roof beam. This measurement dictates the maximum height of your upright frames.
Next, you need to map out every single obstruction. Seriously, everything.
I've seen it happen: forgetting to account for a single support column can throw off an entire row of racking, forcing a costly and frustrating redesign. A detailed floor plan with all these features marked out is your non-negotiable starting point.
Your forklift is the single biggest factor determining your aisle width. A standard counterbalance forklift might need an aisle of 3.5 to 4 metres to operate safely and efficiently. A narrow aisle reach truck, on the other hand, can work in a space as tight as 2.7 metres. Always check the manufacturer's specs for the turning radius of your specific machine and add a bit of a buffer for safety.
Practical Example: A fast-moving parts distribution centre might use wider aisles to allow two forklifts to pass each other, speeding up operations. In contrast, a long-term bulk storage facility might opt for very narrow aisles to cram in as much product as possible, since stock isn't being moved nearly as often.
Once you’ve settled on aisle width, think about product flow. It’s a simple concept that makes a huge difference: place your fastest-moving, high-turnover items in the most accessible spots, typically near the dispatch doors. Slower-moving stock can be stored in less convenient locations. This strategy can slash travel time for your pickers, adding up to significant efficiency gains over time.
This strategic approach is becoming more important than ever. The explosion of e-commerce in Australia has put immense pressure on warehouses to get smarter and faster. Research shows that installing intelligent pallet racking systems is a key strategy for handling this growth, with warehouse applications now making up about 44% of the market share. You can discover more insights about this trend and its impact on the Australian logistics sector.
Your business isn't a one-size-fits-all operation, and your storage system shouldn't be either. The ideal layout for a third-party logistics (3PL) provider handling a huge range of products will look very different from a manufacturing facility storing raw materials. The key is to design a system that works for you.
At Super Rack, we don't just sell components; we provide expert advice to help you design the perfect layout. Our team can help you select the right type of pallet storage racking for your needs, whether it's standard selective rack for easy access or double-deep racking for increased density. With our competitive pricing and nationwide service, we deliver high-quality solutions that help you get the most out of every single square metre.
Alright, with the planning done and the floor prepped, it's time for the hands-on part: building the racking itself. This is where careful, methodical work really pays off. Let's walk through the assembly process step-by-step, focusing on the practical details that lead to a safe, stable, and perfectly aligned system.
This infographic breaks down the crucial steps in designing a functional layout, which is the blueprint for the entire assembly.
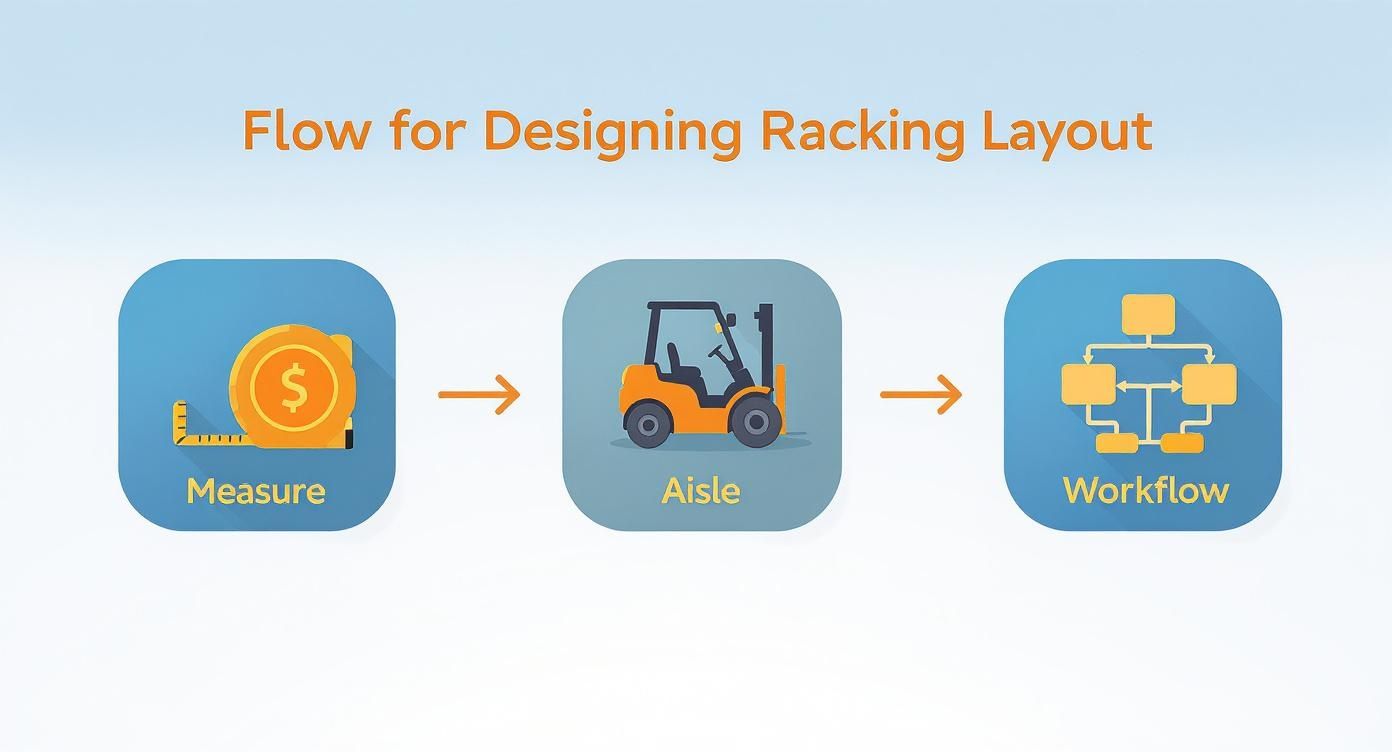
Following this flow—from measuring your space to mapping out aisles—ensures the build goes smoothly, without any nasty surprises.
First things first, you need to build the upright frames. These are the vertical backbones of your racking, and their strength comes down to how well they’re put together. Each frame is made of two posts connected by a series of horizontal and diagonal braces.
To start, lay two upright posts flat on the ground, making sure they're parallel. Now, begin loosely bolting the bracing in place. I always recommend starting from the bottom and working your way up. Don't crank the bolts down just yet; keep them snug enough to hold but with a bit of play.
Once all the braces are on, it’s time to square the frame. This is a critical check. Measure the frame diagonally from corner to corner, then do the same for the opposite diagonal. If those two numbers match, your frame is perfectly square. Now you can go back and tighten every bolt securely with an impact wrench. A square frame is a stable frame.
The very first bay you stand up is the most important one in the whole row. It's the benchmark for everything that follows, so take your time and get it spot-on. This is definitely not a one-person job—you’ll need a team to safely lift the first assembled frame into position.
Once it's standing, connect it to the second frame using the first set of cross beams. Grab a spirit level and check that the frame is perfectly vertical (plumb) and the beams are perfectly horizontal (level). Make any necessary adjustments before you even think about moving on.
Pro Tip: Keep shims handy. Placing them under the baseplates lets you correct for any minor dips or bumps in the concrete, helping you get that first bay perfectly plumb and level. Nailing this now prevents the dreaded "domino effect" of leaning racks, which is a massive safety hazard.
Getting this first bay right is the foundation of a solid install. An out-of-plumb rack puts uneven stress on components and connections, which can seriously compromise its load capacity and overall safety.
With the first bay standing true, you can keep adding frames and beams to build out the row. Getting the cross beams lifted and seated correctly is vital for the rack's structural integrity. This is another moment where teamwork is essential, especially with longer, heavier beams. Always lift with your legs, not your back, to avoid injury.
Each beam has connectors on the end that slot into the teardrop-shaped holes on the uprights. Guide the beam into position and give it a firm tap with a rubber mallet to make sure the connectors are fully seated. You're listening for a solid "clunk" that tells you it's locked in.
The final, non-negotiable step is inserting the safety pin. This tiny piece of metal is what stops a forklift from accidentally knocking a beam loose during loading or unloading. Every single beam must have its safety pin installed correctly. No exceptions.
At Super Rack, the superior quality of our components extends right down to these small but essential details. Our beams and safety pins are engineered for a secure, reliable fit, giving you peace of mind that your system is built to last. And with our nationwide service, you can get this quality, plus expert advice on assembly, no matter where your warehouse is in Australia.

Once your racking is assembled and standing, it might look solid, but the job is far from over. An unanchored rack is a massive safety risk. The final, non-negotiable step in any professional installation is to securely anchor every single upright frame to the concrete floor. This is what transforms a freestanding structure into a stable, integrated system capable of handling heavy loads safely.
This isn’t just a recommendation; it’s a mandatory requirement under Australian Standard AS 4084. Anchoring prevents the racking from tipping over, shifting, or collapsing—especially during an accidental knock from a forklift. It’s the single most important action you can take to ensure the long-term structural integrity of your entire storage system.
Precision is everything here. Before you start drilling, you need to make sure every row of racking is perfectly straight. The best way to do this is with a chalk line. Snap a guide on the floor to ensure the baseplates of all the uprights in a row are perfectly aligned. This simple step keeps your aisles consistent and your racks true.
With the row aligned, use a marker to trace the holes in each baseplate directly onto the concrete. This gives you the exact spots to drill. Move the rack section slightly out of the way and grab a high-quality hammer drill with a masonry bit that matches the diameter of your anchor bolts. It's critical to drill the hole to the correct depth specified by the anchor manufacturer—too shallow, and you won't get a proper grip.
Not all anchor bolts are created equal, and the right choice depends entirely on your concrete slab. The thickness and strength (MPa rating) of your concrete will dictate the type and size of anchor you need. Using an anchor that's too small or not suited for your slab can lead to pull-out failure, which is extremely dangerous.
Here’s a quick rundown of common anchor types:
Critical Insight: The manufacturer's instructions for the racking system will specify the required anchor type and, most importantly, the torque setting. Using a calibrated torque wrench to tighten the anchor nuts is not optional. Overtightening can stress the concrete or the anchor itself, while under-tightening won't provide the necessary clamping force to keep it secure.
For even greater stability, especially in larger setups, you’ll often use row spacers and wall ties. Think of these as the braces that turn individual rows into a single, rigid structure.
Row spacers are essential for back-to-back configurations, where two rows of racking are installed close together. These steel channels bolt between two adjacent uprights, tying the rows together so they act as one solid unit. This dramatically increases their stability and resistance to side-to-side forces.
Wall ties, as the name suggests, connect a single row of racking to a sturdy structural wall. This is a great way to provide extra support, but it’s vital to ensure the wall itself can handle the potential loads transferred from the racking.
Properly securing your system is a core part of any professional installation. In Australia, all pallet racking installations must comply with AS 4084 standards to guarantee safety and structural integrity. Most professional setups are designed to support load capacities between 5-15 tons per rack, catering to heavy manufacturing and wholesale distribution goods. You can read the full research about these industry standards and market trends for more detail.
So, your pallet racking is standing tall and fully assembled. It might look finished, but the job of installing pallet racking isn't over yet. This final phase is arguably the most important one: a series of thorough safety and compliance checks to certify the system is genuinely ready for work. This is where you sign off, confident that every single component is secure and your team can operate safely.
Skipping these final checks is like building a house and deciding not to get the final inspection—it leaves you completely exposed to serious risks. This isn't just about ticking boxes on a form. It's about creating a safe working environment and protecting your people, your products, and your equipment from accidents that are entirely preventable. A detailed walkthrough is your last chance to catch any small issues before they snowball into big problems.
A systematic inspection is the only way to make sure nothing gets missed. Grab a clipboard and walk the entire installation, paying close attention to the small but critical details. This isn't a quick glance from the end of the aisle; it's a hands-on verification of the work that's been done.
Your checklist should include these non-negotiable points:
Key Takeaway: A thorough physical check is non-negotiable. Don't just rely on a visual scan. Walk each row, look at every connection, and confirm that all safety features are in place before you even think about loading the first pallet.
Once the structure itself is verified, you must install clear and accurate load capacity signage, often called Safe Working Load (SWL) signs. This is a mandatory requirement under Australian safety standards, so it's not optional. These signs must be clearly visible, usually on the end of each aisle and sometimes on the beams themselves.
The sign must clearly state:
Without this information, your forklift operators are just guessing at what's safe, which can easily lead to overloading and catastrophic failure. At Super Rack, we supply the correct SWL signage for all our systems, ensuring you have the information needed to operate safely and compliantly from day one. Our commitment to competitive pricing and nationwide service means you get a complete, safe, and compliant solution.
Your final walkthrough is about officially clearing the site for operation. Check that all aisles are free of leftover tools, offcuts, packaging, and debris. Make sure there are no immediate hazards that could trip up staff or damage equipment. This is the official handover from the installation phase to the operational phase.
But safety doesn't stop after the install. A safe system requires ongoing vigilance. This means setting up a regular inspection schedule to catch any damage or wear and tear early on. To get started, you can find a comprehensive guide on our pallet rack inspection page, which outlines exactly what to look for.
A simple weekly check by a trained team member can spot bent beams or damaged uprights from forklift impacts. This should then be backed up by a thorough annual inspection from a qualified professional to ensure your racking remains compliant and safe for the long haul.
Even with the best plans laid out, questions always come up when you're on the floor installing pallet racking. It’s a big job with serious safety implications, so it's only natural to want to get every single detail right. We hear a lot of the same queries from customers all over Australia, so we've put together some answers to the most common ones.
Getting the details right on compliance, safety, and best practices is what makes a project successful. These answers are designed to be practical, straightforward, and help you make the best decisions for your warehouse.
For a small, simple system in a garage, you might be able to tackle it yourself. But for almost any commercial setup, we strongly recommend getting a professional installation team involved. It's about more than just building the racks; it's about making sure the entire system is assembled and anchored according to Australian Standard AS 4084. That's your ticket to safety and compliance.
Professional installers come with the right gear—like torque wrenches and laser levels—and they have the experience to handle heavy components without anyone getting hurt. They're also trained to spot and solve issues you might not notice, like a slightly uneven floor, ensuring the final structure is perfectly plumb and absolutely stable. For genuine peace of mind, bringing in the pros is always the smartest move.
This is one of the most critical safety steps, and it’s not something you can afford to guess. You need to know the absolute maximum weight of your heaviest loaded pallet and the number of pallets you'll store on each beam level. Always refer to the Uniformly Distributed Load (UDL) rating provided by the manufacturer.
Here’s a real-world example: If your heaviest pallet is 900kg and you’re storing two pallets side-by-side on a single beam level, you must have beams with a UDL rating of at least 1,800kg. Don't assume or round down. Overloading is the number one reason for racking collapse.
If you're ever the slightest bit unsure, don't risk it. Our experts at Super Rack can provide specialist advice to make sure you choose racking with the correct specifications for your products, keeping your operation safe and efficient.
If we had to boil it down to just one thing, it's really a two-part check that you can't skip:
Once you’ve ticked off those two physical checks, the final mandatory step before putting any stock on the shelves is to make sure the correct Safe Working Load (SWL) signs are clearly displayed on the racking.
Regular inspections aren't just a good idea; they're a legal requirement under Australian standards. You should have a trained staff member do a quick visual check at least weekly or monthly. They should be looking for obvious damage like bent beams, dented uprights, or missing safety pins—usually the result of forklift impacts.
On top of that, you must have a comprehensive inspection carried out by a qualified professional at least once every 12 months. This proactive approach helps you catch small issues before they snowball into serious hazards, ensuring your system stays safe and compliant year after year.
For expert advice on Super Rack's storage solutions or to get a quote for your next project, our team is here to help. We offer superior quality racking at competitive prices, with fast delivery and service available nationwide.
Visit our website at https://www.superrack.com.au to explore our full range of products.