Think of a mezzanine floor kit as a ‘loft in a box’ for your business. It's a fully engineered system that lets you build a second storey inside your existing warehouse or shed, instantly doubling your usable floor space without the massive cost and headache of moving or building an extension.
This guide is your practical rundown on everything you need to know about choosing, planning, and budgeting for a mezzanine floor kit in Australia.
Unlocking Your Wasted Vertical Space
If you're starting to feel the squeeze in your warehouse, workshop, or commercial space, the answer might be right above your head. A mezzanine floor kit is a seriously smart, cost-effective way to tap into all that empty air.
Unlike a traditional building project, these kits arrive with everything you need: support columns, beams, decking, and safety handrails.
The real beauty of a mezzanine floor kit lies in its adaptability. It’s a completely freestanding structure, which means it doesn't need to lean on your building’s existing frame for support. This makes it a versatile solution for almost any high-ceilinged building, offering a similar space-creating benefit that an extension and loft conversion does for a home.
Real-World Wins for Aussie Businesses
Just imagine the possibilities. A growing e-commerce business in Sydney, drowning in inventory, could install a mezzanine to create a dedicated packing and shipping station above the main storage floor. This simple change separates workflows, clears up ground-floor chaos, and makes the whole operation run smoother.
Or think about a mechanic's workshop in Melbourne. They could add a mezzanine level for a clean, quiet office that overlooks the service bays. This carves out a professional space for admin work while keeping management connected to the action on the floor.
These examples really drive home the benefits:
- Double Your Floor Space: Instantly get more room for stock, offices, or production without making your building's footprint any bigger.
- Expand Without the Expense: Dodge the huge costs and downtime that come with relocating or building from scratch.
- Get Organised: Separate different parts of your business, like storage and admin, to create a tidier and more productive workplace.
- A Future-Proof Investment: Many kits are modular. You can extend them, change the layout, or even pack them up and move them if your business relocates.
At Super Rack, we know that no two businesses are the same. That's why we offer high-quality, competitively priced mezzanine floor solutions that meet tough Australian standards. With our fast, nationwide delivery and practical advice, we make it simple to turn your wasted overhead space into one of your most valuable assets.
The Anatomy of a Mezzanine Kit
So, what exactly are you getting when you invest in a mezzanine floor kit? Think of it as a serious, large-scale flat-pack project. But instead of a bookshelf, you're building a solid new level for your business. Every single piece in the kit has a specific job, and they all work together to create a safe, strong, and reliable structure.
When you understand the role of each component, you start to see why quality really matters. A top-notch mezzanine floor kit from a supplier like Super Rack is a fully engineered system. Every bolt, beam, and board is designed to fit and function perfectly, which guarantees structural integrity and makes the whole installation process much smoother.
Let’s break down the key parts you'll find in a typical kit.
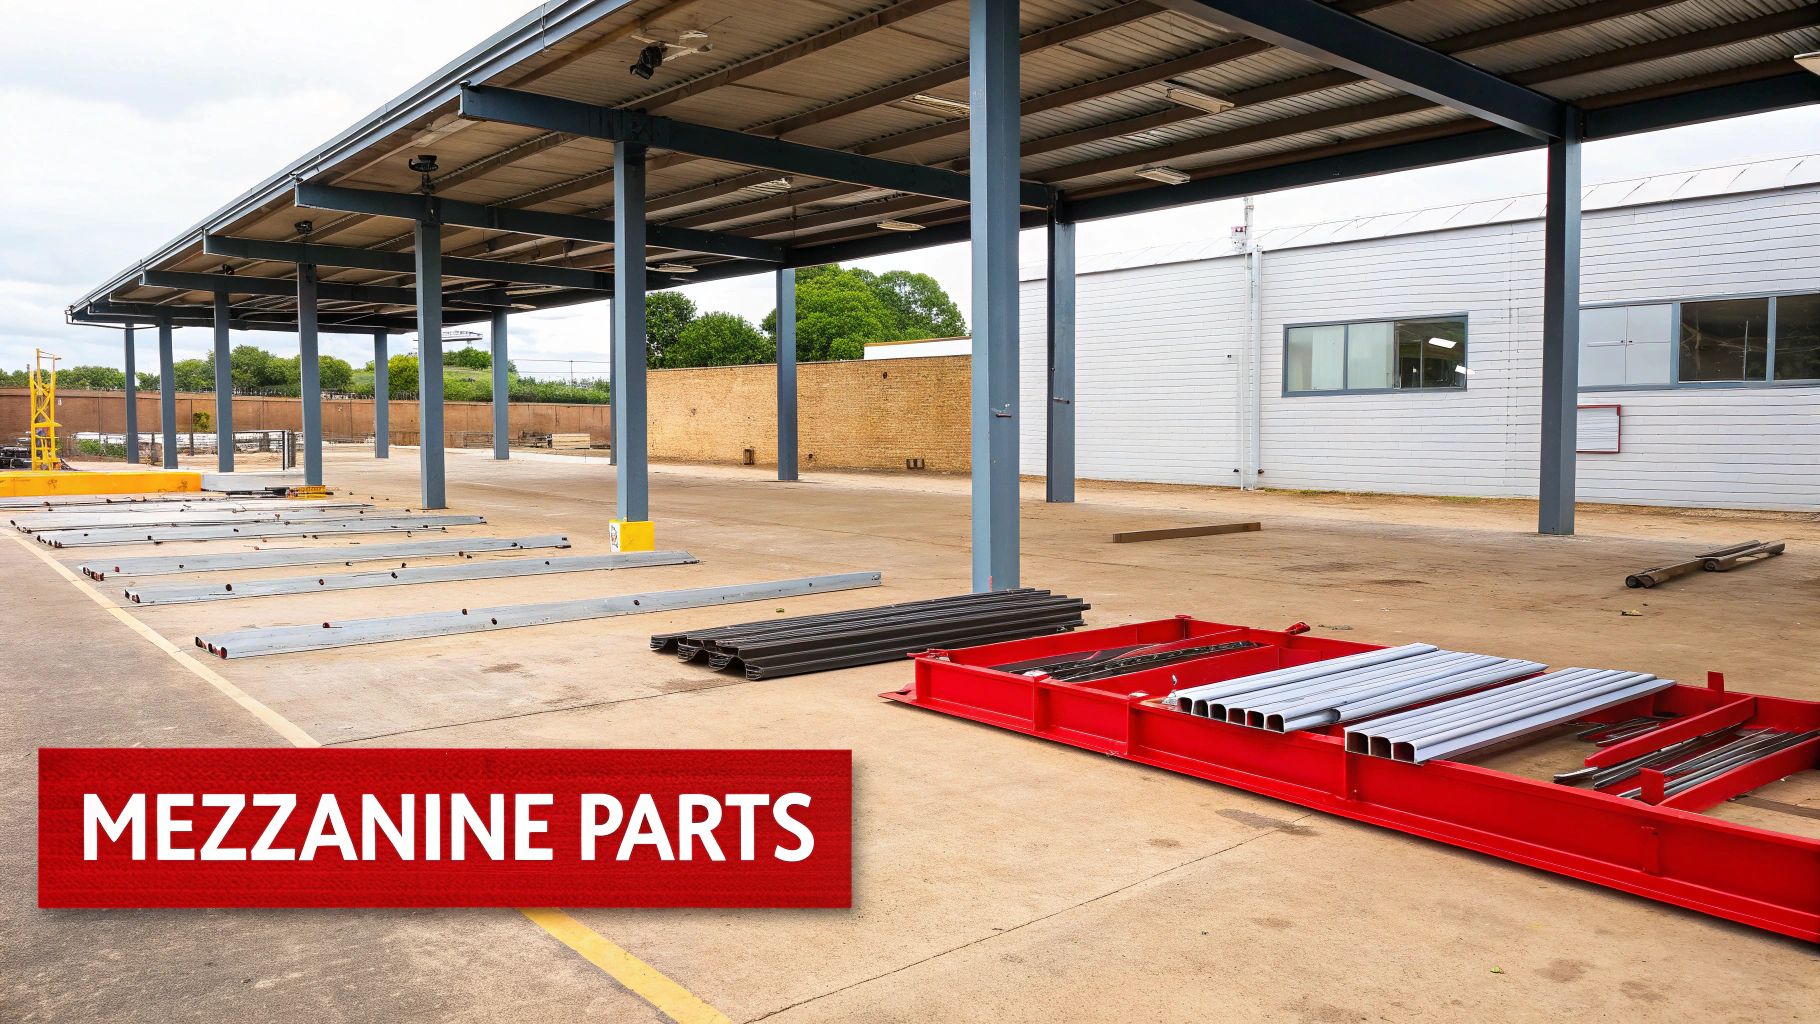
Core Structural Components
At its heart, a mezzanine floor is a steel skeleton. The strength of this frame is what determines the entire structure's load capacity and how long it will last.
Support Columns: These are the legs of your mezzanine. Made from heavy-duty steel, these vertical posts are responsible for transferring the entire weight of the floor—and everything on it—down to the concrete slab below. Their size and spacing are carefully calculated by engineers to ensure total stability.
Primary Beams (Bearers): These are the main horizontal steel beams that connect to the top of the columns. They act as the backbone of your new floor, forming the primary framework and carrying the main load across the structure.
Secondary Beams (Joists): Running perpendicular to the primary beams, these smaller steel joists create a grid-like support system for the flooring itself. They work to distribute the load evenly across the primary beams, which prevents any sagging and gives you a solid feel underfoot.
Decking (Flooring): This is the surface you'll be walking and working on. The most common choice is 32mm structural-grade particleboard, which is known for being strong and cost-effective. For tougher industrial environments, you might opt for steel checker plate for extra durability and grip.
Essential Safety Features
A mezzanine is far more than just a platform; it has to be a safe workspace. These safety components aren't optional—they are absolutely crucial for meeting Australian Standards.
A well-designed mezzanine kit integrates safety from the ground up. Features like handrails and staircases aren't add-ons; they are fundamental parts of a compliant and secure system, protecting your team and your business.
Key safety elements include:
Staircases: Providing safe and easy access to the new level is a must. Staircases need to be built to specific standards, taking into account tread depth, riser height, and handrail placement to prevent any trips and falls.
Handrails and Kick Plates: Any exposed edge of the mezzanine must be protected by sturdy handrails. A kick plate (or toe board) is a low barrier at floor level that stops tools or small items from being accidentally kicked off the edge and onto the people below.
Safety Gates: If you plan on lifting pallets or other goods onto the mezzanine with a forklift, a safety pallet gate is essential. These gates are cleverly designed so that the edge is never left open during loading and unloading, protecting your staff from serious fall hazards.
For enclosing specific areas or creating secure storage zones, you can also integrate solutions like a modular mesh panel to add another layer of safety and organisation.
How to Determine the Right Load Capacity
Of all the decisions you'll make when planning your new space, getting the load capacity right for your mezzanine floor kit is hands-down the most important. This isn't just a box-ticking exercise for compliance; it's about the safety of your team and making sure your investment lasts.
Aim too high, and you could be paying for steel you don't need. Go too low, and you're risking a catastrophic structural failure. It’s a fine balance.
In Australia, load capacity is measured in kilopascals (kPa), which is just a technical way of saying kilograms per square metre (kg/m²). So, a 3 kPa rating means the floor is engineered to safely support 300 kg spread evenly across every single square metre. Simple as that.
Matching Load Capacity to Your Application
The right rating comes down to one simple question: what are you going to do up there? A floor for a few desks and chairs has completely different structural needs than one holding pallets of heavy stock. Getting this wrong can have serious consequences.
Here’s a look at how it breaks down in the real world:
Light Office Space (approx. 300 kg/m² or 3 kPa): Perfect for adding an administrative area above the workshop or warehouse floor. This rating comfortably handles standard office furniture, computers, and regular foot traffic.
General Storage (approx. 500 kg/m² or 5 kPa): This is a great all-rounder for storing hand-loaded archive boxes, spare parts, or lightweight e-commerce inventory. It's one of the most common choices for its versatility.
Heavy-Duty Pallet Storage (750 kg/m² to 1000+ kg/m² or 7.5-10+ kPa): Now we're talking serious weight. If you plan on using pallet jacks or storing full pallets of dense goods, you need a much beefier structure designed to handle heavy, concentrated loads.
Uniformly Distributed Loads vs Point Loads
It's also critical to understand how that weight will be applied. Most standard ratings are for a Uniformly Distributed Load (UDL). Imagine spreading a layer of sand evenly across the floor—that’s a UDL. Stacks of boxes or general inventory usually fall into this category.
A point load is the exact opposite. It's a heavy, concentrated force on one small spot. Think about the four small wheels of a loaded pallet jack, the legs of heavy machinery, or the uprights of a pallet racking system you might install on top of the mezzanine.
Point loads create intense pressure points and demand special engineering. If you plan to put any heavy equipment or racking on your mezzanine, you absolutely must tell your supplier. The standard UDL rating likely won't be enough.
Don't forget what’s underneath it all, either. The mezzanine’s support columns transfer the entire load—the structure and everything on it—down to your concrete slab. Before you go any further, get a structural engineer to assess your foundation to confirm it can take the new load.
Ongoing safety is just as important as the initial design. Just like a professional pallet racking audit, regular checks are essential to maintain the long-term integrity of your mezzanine, especially if it’s working hard under heavy loads.
Here at Super Rack, our experts will walk you through all of this. We take the time to understand exactly how you’ll use the space, ensuring your mezzanine floor kit is perfectly engineered for your needs, giving you total confidence in its safety and performance.
Navigating Australian Building Codes and Compliance
Adding a mezzanine floor kit is a fantastic way to unlock more usable space, but it's important to remember what you're really doing: undertaking a structural addition, not just assembling a big piece of furniture. Getting this wrong can lead to serious safety risks, hefty council fines, and major insurance headaches. This isn't just red tape; it's about making sure your new floor is safe, legal, and a true asset to your business.
While the rules might seem complex at first glance, they really boil down to a few key areas. A measured, step-by-step approach will keep your project on the right track from the start.
The Building Code of Australia (BCA)
Every significant building project in Australia has to play by the rules set out in the National Construction Code (NCC), which includes The Building Code of Australia (BCA). Think of the BCA as the official rulebook that ensures all buildings are safe, accessible, and structurally sound. Since a mezzanine is a permanent structure, it absolutely must comply.
This code outlines the non-negotiable standards for things like structural integrity, fire safety, and access—all of which are directly relevant to your mezzanine installation.
The Importance of Australian Standards (AS)
Working alongside the BCA, your mezzanine must also meet specific Australian Standards (AS). These are the technical documents that get into the nitty-gritty specifications. For any mezzanine project, one of the most critical is AS 1657, which covers fixed platforms, walkways, stairways, and ladders.
This standard dictates essential safety features, including:
- The minimum width and angle of your staircase.
- The required height and strength of handrails.
- The inclusion of kick plates (also called toe boards) to stop items from falling off the edge.
Sticking to these standards isn't optional—it’s a fundamental part of creating a compliant and safe workspace for your team.
Council Approval and Engineering Certification
In almost every single case, installing a mezzanine floor will require a green light from your local council. This usually means lodging a development application (DA) or a similar request, which needs to be backed up by certified engineering plans.
This is where a professional engineer is indispensable. They will thoroughly review the design of your mezzanine floor kit, verify its proposed load capacity, and ensure it ticks all the boxes required by the BCA and relevant Australian Standards. Once they're satisfied, they'll issue a certificate of compliance—the official document you’ll need to get your council application across the line.
Trying to sidestep council approval is a classic false economy. An unapproved, non-compliant structure can void your building insurance, create a massive safety liability, and might even result in the council ordering you to tear it down at your own cost.
This is where choosing a reputable Australian supplier makes all the difference. At Super Rack, safety and compliance are our top priorities. We provide clear, expert advice to help you understand your obligations, ensuring your mezzanine is fully compliant and giving you complete peace of mind.
Planning Your Mezzanine Layout and Installation
A successful mezzanine floor kit installation starts long before the first steel beam is lifted. A solid, detailed plan is genuinely the most important tool you'll have. It ensures your new space is not only compliant and safe but also genuinely useful, helping you avoid common headaches that can disrupt your workflow down the line.
Think of it as creating a blueprint for efficiency. By mapping everything out beforehand, you can design a layout that works with your existing operations, not against them.
Start with Accurate Measurements
First things first: you need to know exactly what you’re working with. Vague guesses just won't cut it here; precision is key. Grab a good quality tape measure and get the core dimensions of where you plan to put your mezzanine.
There are three critical measurements you need to record:
- Clear Height: Measure from the concrete floor up to the lowest overhead obstruction. This could be anything from lighting fixtures and roof trusses to sprinkler heads. This number determines the maximum possible height for both your ground and upper levels.
- Available Width: Measure the total side-to-side distance you have available.
- Available Depth: Measure the front-to-back distance for the new floor.
These numbers create the absolute boundaries for your project. They'll dictate the maximum square meterage you can add and influence pretty much every other design decision you make.
Strategic Column and Staircase Placement
With your measurements in hand, the next step is planning the layout. The goal is to maximise your new upper-level space while causing the least amount of disruption to the ground floor.
The support columns are the legs of your mezzanine, so their placement is crucial. You'll want to position them where they won’t block forklift paths, key machinery, or important access ways. A common strategy is to align columns with existing building supports or tuck them neatly alongside pallet racking to keep your floor space open and clear.
Likewise, the staircase location needs careful thought. It has to provide safe, convenient access without creating a bottleneck downstairs. Think about the natural flow of foot traffic in your facility. Where is the most logical point of entry and exit? Answering this question helps make sure the stairs are an asset, not an obstacle.
The following process flow visualises the key compliance stages involved in bringing your mezzanine plan to life.
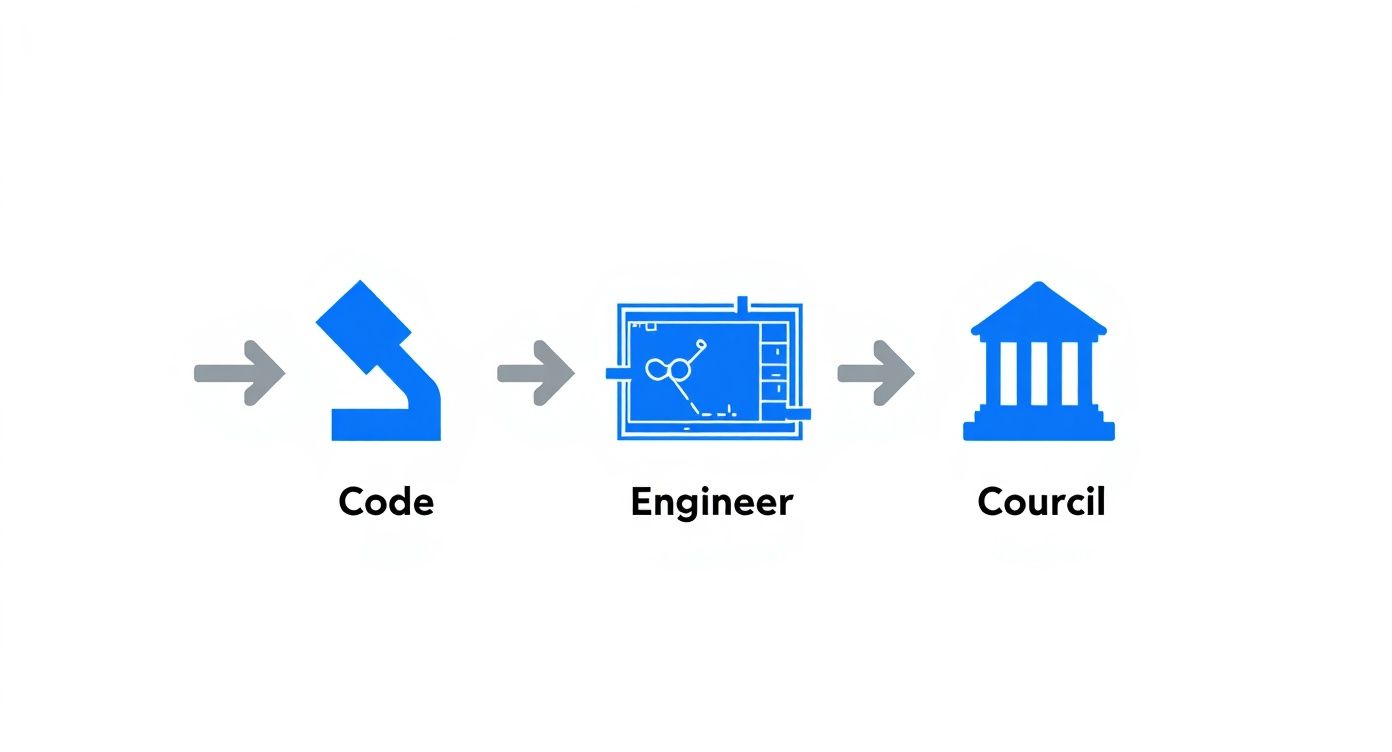
This diagram shows that from initial code checks to engineering and final council approval, each step is a critical part of a successful—and legal—installation.
Thinking Ahead for Utilities and Safety
A truly functional mezzanine needs more than just floor space. It needs power, lighting, and integrated safety systems to be a productive work environment. Planning for these services from the get-go is far easier and more cost-effective than trying to retrofit them later.
Consider these essential points:
- Lighting: How will you illuminate the space both above and below the mezzanine? Good lighting is non-negotiable for safety and productivity.
- Power Outlets: Where will you need power for computers, tools, or charging stations? Map out the locations for your electrical outlets.
- Fire Safety: Your plan must include provisions for fire safety systems, like smoke detectors and sprinklers, to comply with Australian regulations.
Planning is about more than just fitting a structure into a space. It’s about designing a fully integrated workspace that enhances your entire operation from day one.
At Super Rack, our team excels at helping businesses navigate this planning phase. We offer practical, nationwide advice to design a layout that maximises your return on investment. Explore our versatile mezzanine floor options and let us help you build a smarter space.
Talking Dollars: How to Budget for Your Mezzanine Floor Kit
Let's get straight to the point: what's this going to cost? Thinking about the budget is obviously a huge part of planning, but figuring out the price of a mezzanine floor kit is more straightforward than you might expect. Generally, it all comes down to a price per square metre, which gives you a solid baseline for estimating your total investment.
Getting a handle on the key things that influence this price will put you in the driver's seat when you're looking at quotes. It helps you see exactly what you’re paying for and why a quality, compliant system from a trusted name like Super Rack is a smart long-term move.
What Drives the Price Up (or Down)?
The final cost of your mezzanine floor kit is about more than just its footprint. A few crucial factors come into play, and they all circle back to the safety, strength, and day-to-day usability of your new space.
Here’s what really moves the needle on cost:
- Overall Size: This is the big one. The total square meterage directly impacts the amount of steel, decking, and labour needed. A bigger floor means a bigger budget.
- Load Capacity: This is a major variable. A floor built for a lightweight office setup (rated around 300 kg/m²) will use far less heavy-duty steel than one engineered to hold heavy pallets (which could be 1000 kg/m² or more). Stronger floors need beefier, more expensive materials—it’s as simple as that.
- Decking Material: Your choice of flooring makes a difference. Structural-grade particleboard is the go-to for a reason; it's tough and cost-effective. But if you need something like steel checker plate for a greasy workshop environment, expect that to bump up the cost.
- Accessories and Add-ons: How you get up and down, and how you keep everyone safe, will also be part of the final quote. Things like staircases, safety pallet gates for loading, and extra handrailing are all factored in.
What's a Realistic Budget to Expect?
So, what should you plan for? To give you a real-world starting point, let’s look at typical industry pricing here in Australia. For a custom-engineered mezzanine floor that includes all the essential structural engineering to meet Australian Standards, you're generally looking at a range from AUD $350 to over AUD $600 per square metre. This covers a standard storage-grade system that's complete, safe, and professionally designed. For a deeper dive into costs, especially for sheds, you can learn more about mezzanine guide prices in Australia.
Think of a properly engineered mezzanine floor kit not as an expense, but as a long-term investment in your business's efficiency and safety. That upfront cost covers top-quality materials, certified engineering, and the compliance that protects both your team and your assets.
At Super Rack, we pride ourselves on offering competitive pricing without ever cutting corners on quality. We give you transparent, detailed quotes so you know exactly what’s included. You get a superior, Australian-compliant mezzanine floor kit that delivers real value. And with our nationwide service and fast delivery, we make it simple to budget for and install the perfect space-making solution for your business.
Frequently Asked Questions
Thinking about a mezzanine floor kit? You're not alone. Here are the straight-up answers to the most common questions we get from businesses just like yours.
How Long Does Installation Take?
This is one of the biggest advantages. Because every component is prefabricated, a standard mezzanine can be fully installed by a professional team in just a few days. It's worlds away from the weeks or months of disruption that come with traditional construction.
Do I Need a Forklift for Installation?
Yes, a forklift or similar lifting gear is a must-have. You'll be dealing with heavy steel beams and columns that need to be moved and positioned safely. If you don’t own a forklift, we strongly recommend using a professional installation crew who will bring all the right equipment for the job.
Can I Move or Extend the Mezzanine Later?
Absolutely. That's the beauty of a modular system. Unlike a permanent build, a mezzanine floor kit is a freestanding structure. You can dismantle it, move it to a new warehouse, or add extra bays down the track as your business grows. It’s a smart investment that adapts with you.
Do I Need Council Approval?
In almost every case, the answer is yes. Adding a mezzanine is a significant structural change, so it will need to be signed off by a certified engineer and receive council approval to comply with the Building Code of Australia. It might sound like a hassle, but this process gives you total peace of mind that your new floor is safe and fully compliant.
Getting these key questions answered helps clear the path from planning to completion.
Ready to turn that wasted overhead space into a valuable asset? The experts at Super Rack are here to help you design the perfect, compliant mezzanine solution for your business. For superior quality, competitive pricing, and nationwide service, contact the Super Rack team today for a no-obligation quote.